

Convert JPG to PES: The Modern Way to Create Embroidery-Ready Designs
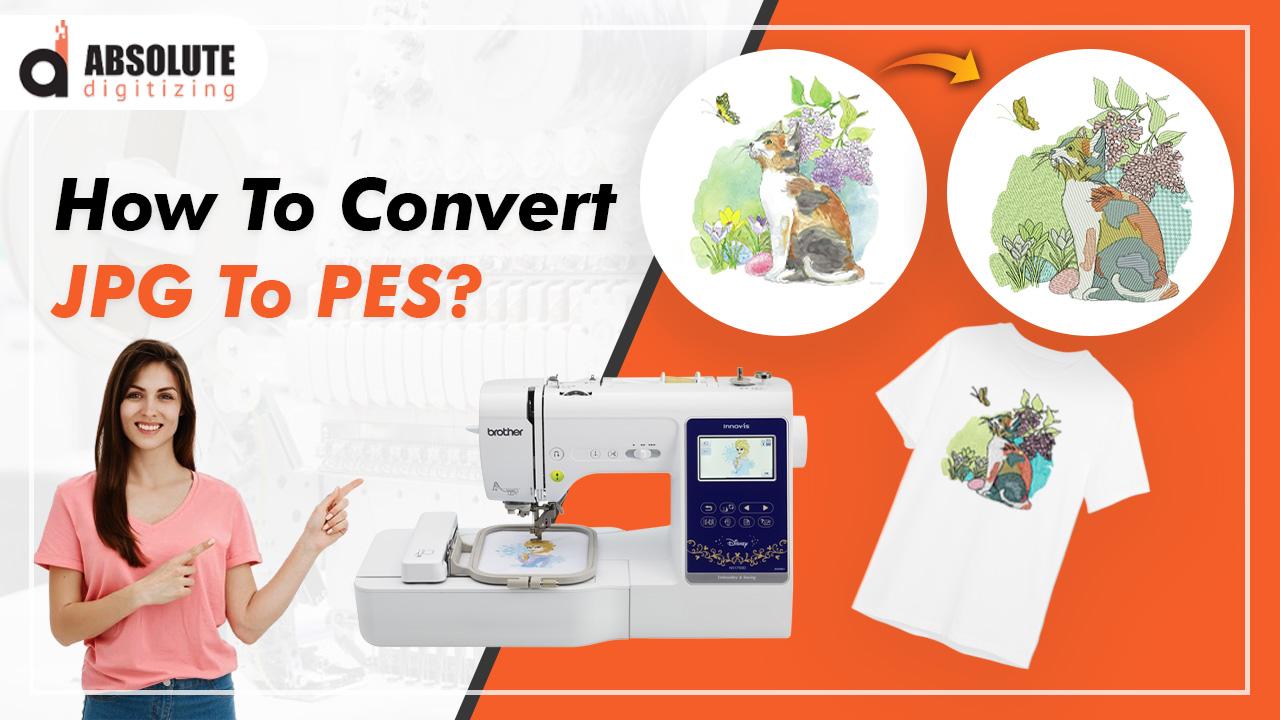
Hey there, embroidery lovers and creative entrepreneurs! Nothing beats the moment your machine starts stitching out a design you dreamed up—a logo for your side hustle, a family portrait for a gift, or a trendy graphic that’s about to drop on custom hoodies. The PES format is the secret sauce for anyone using Brother, Babylock, Bernina, or similar home-to-semi-pro machines. It’s the native language these machines speak, so when you convert JPG to PES properly, you get smooth runs, accurate registration, clean small text, and vibrant results that look expensive. Skip the smart steps and you’ll face puckered fabric, thread nests, or a finished piece that looks nothing like your original image. This guide walks you through the modern, efficient way to convert JPG to PES so every project comes out looking sharp and professional.
Why PES Is Still King for Most Home Embroiderers in 2026
PES was created by Brother and became the default format for a huge family of machines because it balances compact file size with rich stitch information. It stores needle coordinates, stitch types, density, underlay, pull compensation, color sequence, trims, jumps, and special commands like slow-down regions or stop points.
When you feed your machine a native PES file, it loads instantly, previews correctly on the LCD screen, and stitches with the tension and speed the engineers tuned for. Other formats often introduce small translation errors—registration drift, unexpected density changes, or long jumps that cause breaks. Staying in PES keeps everything predictable and optimized, especially on newer multi-needle models that run faster and handle denser artwork.
The Real Cost of Skipping Proper Conversion
Most people assume “auto-digitize” means “just press a button.” Auto tools work okay on super-simple clipart, but they struggle with anything realistic: photos, gradients, small text, curves, or overlapping shapes. Common disasters include:
- Small letters filling in completely
- Over-dense fills that pucker the fabric
- Long jumps that snap threads mid-run
- Colors shifting between layers
- Designs that look flat and lifeless instead of dimensional
These issues waste expensive blanks, thread, stabilizer, and your time. A smart conversion avoids all of them by turning pixels into thoughtful stitches that respect fabric behavior.
Clean Up the JPG Before You Start
The conversion is only as good as the starting image. Spend five minutes prepping:
- Remove the background completely (transparent or solid white).
- Increase contrast so edges are sharp and defined.
- Reduce colors aggressively—aim for 8 to 15 solid shades.
- Eliminate details smaller than 3–4 mm (they fill in anyway).
- Crop tightly around the subject.
- Resize to your final embroidery dimensions now—never scale up later.
For logos or text, make sure lettering is at least 5 mm tall and use blockier fonts when possible. Clean artwork makes digitizing faster and gives dramatically better stitch quality.
Choosing Modern Software That Exports Clean PES
The software you pick determines how much control you have and how good the final PES file will be. Here are the top choices designers use in 2026:
- Embrilliance Essentials + StitchArtist – affordable, beginner-friendly, excellent PES export
- Hatch Embroidery – powerful auto-digitizing, great manual tools, reliable PES output
- Brother PE-Design – native PES support, seamless if you already own Brother machines
- Ink/Stitch (free Inkscape extension) – completely free, exports PES surprisingly well for simpler designs
Start with Embrilliance if you want something easy and low-cost, or Hatch if you’re ready for more advanced features. All of them let you preview realistically and tweak manually.
Step-by-Step Modern Conversion Workflow
- Import the cleaned JPG and lock it as a reference layer.
- Run auto-digitizing for a quick first pass (ideal for simple logos).
- Switch to manual mode and trace every major element separately: background, mid-layers, outlines, text, accents.
- Assign stitch types: satin for borders and lettering (glossy shine), tatami for larger fills (even coverage), running for fine lines.
- Add underlay to every object—edge-run under satin, grid or zigzag under fills.
- Apply pull compensation: widen satin columns slightly to fight fabric push.
- Optimize paths: connect nearby objects, hide travel runs, shorten trims, add tie-offs.
- Sequence colors logically: large areas first, details last.
- Preview in 3D simulation—check density, pull effects, and backside appearance.
- Export as PES with correct hoop size and centering.
Save both your working file and the final PES export with clear names.
Testing and Tweaking for Flawless Results
Export the PES file, transfer it to your machine via USB, and stitch a sample on scrap fabric matching your final project—same weight, stretch, and color. Watch the first few colors closely. Look for puckering, misalignment, tension issues, or small text filling in.
Common fixes:
- Puckering → reduce density or add more underlay
- Small text disappearing → enlarge letters or add extra underlay
- Registration drift → review color sequence and compensation
- Thread breaks → shorten jumps and optimize paths
Make small adjustments, save a new version, and test again. One good sample guarantees success on the real garment.
Quick Habits That Save Time and Fabric
- Keep stitch counts reasonable (under 50,000 for most home projects)
- Use high-quality thread that matches your software’s palette
- Vary stitch angles to reduce pull in one direction
- Group similar colors to minimize thread changes
- Always test on the exact fabric type you’ll use
These small choices separate okay embroidery from the kind that makes people stop and say “wow.”
Conclusion
Converting JPG images into PES embroidery files is straightforward when you follow a smart process: clean preparation, thoughtful stitch choices, proper underlays and compensation, optimized paths, realistic previews, and thorough testing. When you do it this way, your Brother, Babylock, or Bernina machine runs efficiently, your designs look expensive, and your finished pieces turn heads. Whether you’re embroidering for fun, creating gifts, or running a custom apparel side hustle, mastering this conversion puts professional-quality results within reach. Grab your next JPG, open your digitizing software, and start building that perfect PES file. Your next embroidered project is waiting to shine—one clean, confident stitch at a time.
